Notification board
The Notification Board is a module within clevr that you can use to view all notifications that you have received and sent to other users.
| ACCESSING THE NOTIFICATION BOARD |
If the Notification Board has been enabled for your role, it can be accessed via clicking on the bell icon in the top left icon bar. If this icon is missing for you please contact the clevr Support Team via the “Contact Us” page and we can quickly enable it for you.

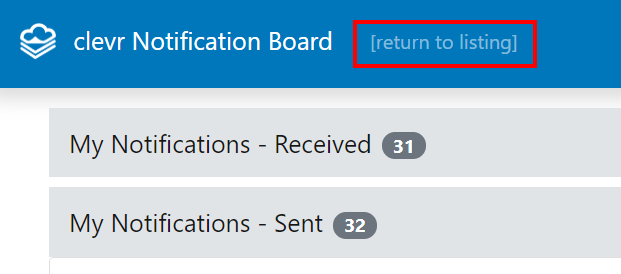
When you load the Notification Board, you can choose to view the notifications you either sent or received. The total number of notifications you have sent or received will be displayed beside each heading:

| NOTIFICATION BOARD OVERVIEW |

| Notification Board Fields | |
| Notification | The name that has been assigned to the notification. |
| Sent By | The name of the user who pressed the send button. |
| Last Updated | The date the record was last updated. |
| About | The name of the staff, student, or school with the record the notification is in reference to. |
| Form | The name of the form the notification was deployed from. To open the specific record, click this link. |
| Login Link | Whether or not the email sent for this notification contains a link. |
| Status | The four status options are View, Sent, Not Sent ("not sent" means that the email failed to send for any reason like the mail server being unavailable at the time, too many notifications deployed at the same time, something in the message body causing a runtime error, or the recipients email address is invalid), or Board Only which means the notification did not generate an email for the user and it was configured to appear within the Notification Board only. |
| Disabled | Only applicable if a link was included in the email. This field indicates if the link was disabled. |
| Action Priority Custom Fields 1 - 3 |
These columns can be flagged from a form field to appear in the Notification Board. |
| FILTERING NOTIFICATIONS |
You also apply a filter to narrow down your list of notifications. Click the “Apply” button and select your parameter. Click the icon of the trash to remove a filter. The “Or” button will allow you to apply a second set of filters to run a search that returns results that match either filter you have applied while the plus sign will return results that match both filters. When you have applied your filters, click the “Apply” button to run the search.


Click the “Clear” button to remove your filters.

| ARCHIVING NOTIFICATIONS |
Notifications you are finished with can be archived to keep your main view tidy. Begin by clicking on the “Archive” button:

In the popup window, check the checkbox beside the Notifications you would like to archive, then click the “Archive” button:

You will receive a popup confirming you the number of notifications that you have chosen to archive. Click the “Archive” button to accept or “Back” to cancel.

| ACCESSING ARCHIVED NOTIFICATIONS / REACTIVATING ARCHIVED NOTIFICATIONS |
Click the “View Archive” toggle to see notifications you’ve archived.

Notifications can be reactivated by clicking on the “Reactivate” button after you have toggled “View Archive”. In the popup window, check the checkbox beside the Notifications you would like to reactivate, then click the “Reactivate” button. This will make them appear in the main Notification view.

| EXPORT DATA |
You can export your notifications out of clevr by clicking on the icon of the three dots and clicking “Export Data”:

This will download a .csv file to your computer with the notification details.

| RETURN TO HOMESCREEN |
At any time, if you wish to return to your implementation from the Notification Board you can click the Return to Listing button.