Groups and Classes
The Groups and Classes module allows you to add and manage custom groups within clevr and gives you a view of classes that have been imported into clevr from a SIS integration.
Groups and Classes can be accessed via clicking on Admin > Groups and Classes.

This is what the Groups and Classes Module will look like if no Groups have been created:

Creating a Group
To create a custom group, click on the Add button above the table. This will open a screen where you can type in the information for your group. Below this image you will find a description for each of the fields.

| Group Location | This is the location/school the group members are associated with. |
| Group Name | The name of your group (Ex: Teacher name’s grade 4s) |
| Group Code | You can assign a code to your group if you’d like. (optional) |
| Group Section |
You can assign a section to your group if you’d like. (optional) |
| Group Size | The current size of the group. (optional) |
| Group Max Size | The maximum number of users that can be added to the group. (optional) |
| Group Description |
Here you can enter a short description of your group. (optional) |
After you have finished filling in the data press the Submit button. When you have pressed submit, two additional buttons will appear - one to remove the group, and one to submit/view/modify group members. The table on the previous screen will also be updated to reflect the addition of the new group.
Adding Members to Your Custom Group
In the Groups and Classes module, select a group that you have created. In the pop up window that appears, click on “Submit and View/Modify Group Members”

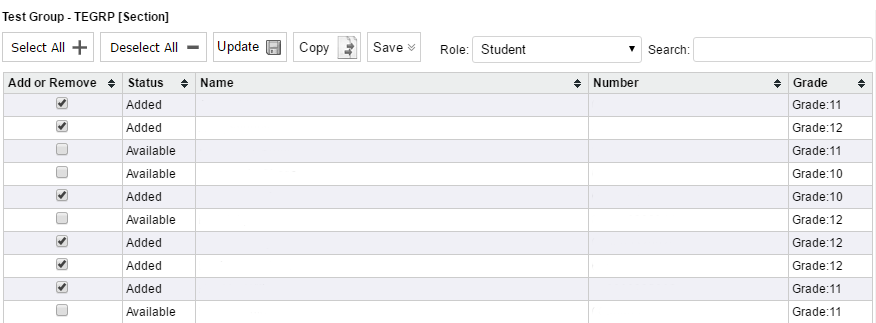
In this pop up window, change the role dropdown shown above to the role of the user(s) you would like to add to your group. To add members to your group, simply check the checkbox beside their name and press update. After update is pressed, the window will refresh and the group members who have been added will say “Added” in the status column. To remove a group member, simply uncheck the checkbox beside their name and press update.
If you do not wish to scroll through all available staff and students, you can use the search feature in the top right hand corner of the pop up window to search first name, last name, student number, or grade. As you type the list will update in real time.
Deleting a Group
To delete a group, simply click on the red X beside the table listing for that group.
SIS Classes
To view classes that have been integrated into clevr from your SIS, select the SIS Classes tab in the Groups and Classes module. Classes from the location selected in the top right hand menu will be displayed. You can also change the dropdown shown below to a different school to show the classes available at that location.
SIS classes shows you a read only version of the available class data - you can not use SIS classes within clevr to modify your SIS classes. Click on the person icon to open a pop up window that will display the students and staff that are associated with the class.
