Dashboard ENd User Guide
Revised January 12th 2022
WHAT IS CLEVR
clevr™ is a cloud-based electronic forms and workflow solution that enables educators as well as parents / legal guardians to complete school forms with ease, and facilitate instant communication. clevr is a real-time environment with a robust set of tools to help educators and parents stay informed and connected during the education process.
Highlights
Role-Based Dashboards
Notifications and Alerts
Electronic Signatures
Submit Forms Online
PURPOSE-BUILT DASHBOARDS
Dashboards have become a standard business tool over the last decade. To meet this demand, clevr has modernized the Dashboard to be responsive, design focused, and user-friendly driven by the feedback gathered through our Customer Advisory Board.
The modernization of the Dashboard ensures that all clevr users have an intuitive, customizable, and effective solution to display business data that matters most to them.
Highlights:
Responsive design framework
Mobile friendly
Role-based templates
Personalize your columns and filters
Success metrics and notifications
Beautifully designed and engaging
TRY OUT THE NEW DASHBOARD

To help with planning and becoming familiar with the new dashboard feature before it’s deployed, you can try the new dashboard from the legacy homescreens. Note this option is not available to roles that are already configured with the new dashboard.
To trial the new Dashboard, click the Navigate to New Dashboard icon within the top left icon tray.

You can return to your legacy homescreen at anytime by clicking Home. You can set the new Dashboard as the landing page within your user account by clicking the Set as Landing Page button.

Once the new Dashboard has been set as the landing page within an account, users are not able to change it back to the legacy landing pages.
DASHBOARD CARDS
A dashboard card is a container to group similar content with actions to manipulate the content. The card header includes a title to identify the type of content being displayed as well as actions to manipulate the data in the card.
For example: in the Listings Card you can change the form that you’re looking at and clevr will save your selection even if you leave the Dashboard and come back to it, versus always resetting back to the default form. This is a huge improvement over the legacy Homescreens.
All Dashboard Cards were designed with search functionality in mind, making it faster and easier to find the information you need without having to navigate to other modules. Below are the Dashboard Cards currently available.The new Dashboard is constantly evolving to include new features. As new cards are available they will be documented within our release notes and included on the Add New Cards carousel. We go into more detail about each Dashboard Card in the Dashboard Navigation section below.

DASHBOARD NAVIGATION
Your system administrator will determine which cards are being used within your implementation. Most implementations will not have every card mentioned below. If you would like to request a new card to be added to your Dashboard, please contact your system administrator.
Selecting Your School and Form
Each user is assigned a default location (school) and form which will be the default options your Dashboard lands on. The Dashboard differs from the legacy Homescreen and Dashboard in that it has memory - previously users were assigned a default form that they always landed on when logging in. The new Dashboard is capable of remembering which form you were using during your last login and will return you to it.
Users who have access to more than one school can change the location dropdown beside their name found at the top right-hand corner above the navigation menu. The form can be changed via the form dropdown.

Listings Card
The Listings Card provides a table with persons associated with a form and provides the ability to filter on all columns in the table and add new persons to the form.

Listings Card - Accessing a Record
Click on any name within the Listings Card to navigate to that person’s record.

Listings Card - Adding a Person
Persons (in clevr a person is the subject of a form and can include students, staff, locations, parents, etc) can be added to the currently selected form by clicking the Add button. To add a person to a form on a Listings Card:
Click the Add button at the top of the Listings Card.

Use the search field to look for the person you would like to add to the form. You can choose to run your search based on any searchable categories such as Last Name, First Name, Number, Status, Grade, or Role. Click the trash icon beside a field to remove that specific filter.

Click Apply to run your search. All persons who meet the conditions specified in your search will appear below.

Select your desired person by checking the checkbox on the left-hand column.

Click Add Selection button to add the selected student to the form the Listings Card is set for.

If you have access to the Bulk Data Entry module and the selected form has fields flagged for Bulk Data Entry, then a pop-up window appears asking if you would like to update/enter data through Bulk Data Entry for your selection.
If you click Yes, the Bulk Data Entry Specifics page will appear.
If you click No, you’ll be redirected to the first student’s form.

Listings Card - Removing Persons

To remove a person, click the three dots in the top right corner of the Listings Card, then click Remove.

A pop-up window will open. Click the checkbox beside any persons you’d like to remove, then click the Remove Selection button.

Listings Card - Category
As you grow your usage of clevr, you may find that your list of forms is getting long, which could take some time scrolling through to find the exact form you’re looking for. That’s why we have this particular Dashboard Card to help you organize and categorize forms by type, department or use case. Categories are created using the Form Management module and these categories are unique to your clevr environment. For example: Clinical Support Services or Parent Forms
Once your forms are categorized, the category names will appear within the Category dropdown. The Category dropdown has default All or Uncategorized options. The Category dropdown will expand all forms listed under the category you’ve selected.

Listings Card - Customizing the Columns
Within the Listings Card, users can customize which columns appear within the results table. This setting can be configured at the Dashboard template level and further configured by the user.


Simply click the three dots on the top right corner of the Listings Card, select Configure.

Use the toggles to select which fields are visible or hidden. Users will also have the option to restore the default settings or to revert to the last saved dashboard. Click Apply and Save to apply your desired changes.

Listings Card - Searching and Filtering
A filter can be applied for those seeking to narrow down the persons appearing in the Listings Card. The filter works in conjunction with the form selected in the form dropdown. The default search value defaults to Person Status > Active so that you see only the records of persons who are active at that location. For example, this hides students who have left the district / division.

By default, your Dashboard search will look at only the most recently created record. If you would like your search to return results for all records select Records to Include in the filter dropdown then select All Records.

Within the Listings Card search, the + icon can be used to apply additional filters. The trash can icon is used to remove a filter. When you have all your desired filters, click the Apply button. The Listings Card will be updated with the persons that match your parameters.


Listings Card - Saving Common Searches

If you have a set of filters that you would like to apply frequently, the search can be saved. With your filters applied, click the Save Search button in the top right corner of the Listings filter area.

You will be prompted to enter a name for your search. Users who have the Listings - SaveSearchToRoles page right will be permitted to share the search with specific roles. Users without this page right will only be permitted to save a search for their own account. Name your search and specify which role(s) the search should be shared with, then click the Save Search button. If you wish to apply your search automatically in the Listings Card when the form is chosen, you can select the Set as Default checkbox.

If a search has been saved, the dashboard will remember this and automatically apply your search filters the next time you log in.
Listings Card - Accessing Custom / Summary Reports

Some forms have Custom or Summary reports enabled which are specialized printouts that combine with Advanced Search to give you a snapshot of all records that meet the predefined parameters. If you have form(s) with Custom / Summary Reports enabled, you can access them in the listings card.
Click the three dots in the top right corner to open the menu. Within the menu, you can select your Custom report or you can choose Summary Report which will take you to the legacy Homescreen where you can find the menu items to run the report.

Listings Card and Messages Card Video

metrics card

The Metrics Card works in conjunction with the location you have selected in your top right location dropdown and the form selected within the form dropdown of this Card. The form selected in the Listings Card has no impact on the Metrics Card.
It can tell you the total number of records, the total number of complete records, and the total number of uncompleted records for the selected form. Completed and uncompleted records will check the required fields on the form to determine the metrics that are displayed on this Card.

Any field from the form can also be flagged to appear within the Metrics card which allows you to run a search with the click of a button.

Click on any item within the Metrics Card to open a new window. This will show you all records that fit your parameter. Click on any name within the pop-up window to be taken to that person’s record.

Metrics Card Video

Saved Search Card

The Saved Search Card provides an easy way to access all searches that have been saved in clevr. The option to save a search is only available to users with the Dashboard - SaveSearch page right. Users with this page right can modify searches they create and select any search assigned to their role. The Listings - SaveSearchToRoles page rights grants a role the ability to save a search with other role(s).
By default, your Dashboard search will look at only the most recently created record. If you would like your search to return results for all records select Records to Include in the filter dropdown then select All Records.

Saved Search - Adding a New Saved Search
To save a search, you will need to navigate to the Listings Card.
In the example below we have selected the Assessment Report Form and have applied three separate parameters to narrow down out search results:
Person Status = Active
School Year = 2021-2022
Grade = 2, 3, 4, 5
With the parameters applied, you can save this criteria by clicking the Save Search button.

You will be given an option to update your saved search (if one exists for the form specified), or enter a name for a new search.

What you name your search is up to you, but we recommend a name that references what the search is for. Once you click Save Search, your new search will appear within the Saved Search Card.

The Saved Search Card works in conjunction with the location dropdown in the top right corner. Searches will be collapsed by default.
To run a saved search, click the name of the form you’ve saved a search under, then select the appropriate search.

Clicking on the name of your search will cause it to run in real time. A window will open with the names of all records that fit your parameters. Click on the name of any person within the pop-up window to navigate to their record.

Saved Search - Editing an Existing Saved Search
You can edit the name of your saved search as well as which roles have access to it. To edit an existing saved search, you will need to navigate to the Listings Card. Then:
Click the Save Search button to open the Save Search pop-up window.

Select the saved search that you would like to edit and click the pencil icon.
Click the checkbox next to the role(s) you would like to grant access to the saved search or modify the name of the search.
Click Save Search to apply your changes and close the pop-up.

Saved Search - Deleting a Saved Search
You can manage your saved searches from a menu dropdown on the Listings Card. To delete a saved search:
Click the Save Search button.
From the dropdown menu that appears, click the pencil icon beside the saved search you would like to delete. The Save Search pop-up window appears.

Click Delete on the top right-hand corner of the pop-up window.
A pop-up window appears asking if you’re sure you wish to permanently delete this search. Click Delete. The saved search is now deleted.

Saved Search Card Video

Quick Links Card

The Quick Links Card is an accordion style menu of forms by category. It provides a quick way for you to navigate to all forms you have access to. All forms are grouped by category and listed in alphabetical order. Clicking the form name will open all active records in a pop-up window.

Quick Links Card Video

My Forms Card

The My Forms Card provides an easy way to see forms that are assigned to the user that is logged (sorted by most recent). This is primarily used within implementations that use staff forms. To view your record for a form within the My Forms card, simply click on the form name to open the record.
The Add button allows the user to create a new record for themselves. This process always adds a blank new record and once the record is created, it opens up the record.

In the Add Form window you will be prompted to select a location and form (for the selected location). The Location field lists all active locations for the tenant while the Form field will display the list of forms associated with the role.

Clicking the Add Form button will create a record under your name for the specified form and will navigate you to the newly generated record.
Student Record Access Card

The Student Record Access Card provides a list of records that the user has access to, and allows users to request access to specific students’ records. The list in the Student Record Access Card only displays active records.
Approved access will appear at the top of the card within the Student Record Access portion. Previously submitted requests awaiting approval will appear within the bottom Pending Request portion.

My Forms Card Video

Student Record Access Card - Request Access
The Request Access screen allows a user to request access to either an existing record or to add a new student/registration to clevr. This is primarily used for clevr Tenants that have Parent Access permissions.


If you are requesting access to a student currently enrolled within the district, select the I’m requesting access to an existing record radio button. If you are registering a new student into the system, select the I’m creating a new registration. Use this option to add a new student. radio button. The Form dropdown displays a list of forms your role has permission to access. Once you’ve entered the appropriate information, click Request Access to submit your request.
If you register a new student, the record will be immediately created and available within the Student Record Access card. You can click on their name to open the record.

If you request access to an existing student’s record, the request must be manually approved by school staff. These requests are reviewed manually and may take some time for approval. Pending requests will be viewable within the Pending Requests bottom portion of the Dashboard Card. Once approved, the record will appear within the top portion of the Dashboard Card.

Student Record Access Card - Remove Access
This option allows you to remove a record from their Student Record Access Card list. Click the icon of the three dots in the top right corner of the Student Record Access Card. Within the popup window, check the checkbox beside the name of the student whose record you would like to remove, then click the Remove button.


Once removed, if a record has a status of Active, then the Remove action should set the status in groupings to Archive.
Student Record Access Card Video

Profile Search Card
The profile search allows a user to search for active persons and will navigate into the clevr Profile for the specified person once a selection has been made.
Within the Profile Search Card, you can narrow down your search using the following parameters:
First Name
Last Name
Identification Number
Email Status
Role
In the example below we configured our search based on last name and role. After you have specified your search criteria, click apply to see your results.

After you hit apply, the bottom portion of this card will be updated with a list of persons that match your parameters. Click on the name of the person whose profile you would like to view and click their name to be navigated into their clevr Profile.

The clevr Profile allows you to see an overview of the records a person has for each form. Form fields can be flagged to appear within the clevr Profile module which can provide even more information and context. clevr Profile specific information can be found within this help document: https://www.clevrcommunity.ca/clevr-profile
Profile Search and Quick Profile Search Video

Quick Profile Search Card
The quick profile search component allows a user to search for a person by using an autocomplete to gain access to their profile.

Within this Card, you have the ability to search for either a Student or a Staff member. Entering in the last or first name of the person will auto-populate a list of profiles that match your search criteria to make it easier to locate that specific person within clevr.

The clevr Profile allows you to see an overview of the records a person has for each form. Form fields can be flagged to appear within the clevr Profile module which can provide even more information and context. clevr Profile specific information can be found within this help document: https://www.clevrcommunity.ca/clevr-profile
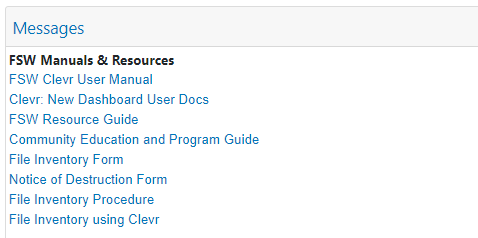
Tenant Messages Card
The Tenant Messages Card displays alerts and messages that have been added to your clevr system. Alerts and messages are used to provide end users with important information and updates that they need to be made aware of.
Information for setting up alerts can be found within this help document and is reserved for System Administrators: https://www.clevrcommunity.ca/alerts
HAVE QUESTIONS? WE’RE HERE TO HELP
Browse Online Support
clevrcommunity.ca is a convenient place to find information about clevr features, recent updates, webinar recordings, how to submit a support ticket, and more. Check it out:
Talk to a Live Agent
If you prefer, you can also get in touch with us by phone at 613-966-6806. Our knowledgeable staff is technically trained and available to assist you.